


Types of Illumination Techniques
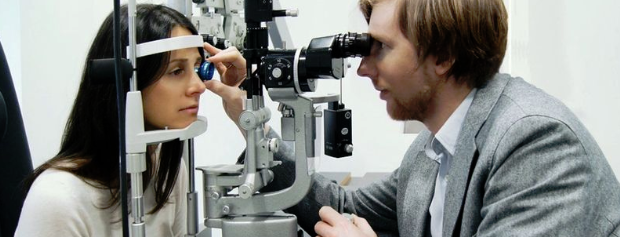
The slit lamp is mounted on a moveable stand. The joystick is used to move the slit lamp left, right, backwards and forwards, as well as raising or lowering it. It has a slit projector which can pivot 180 degrees. The instrument also consists of a beam that can be projected tangential, perpendicular or adjusted to an angle of preference. Ensure you move the light source frequently at different angles while performing the examination - it makes it easier to identify abnormalities.
There are several slit lamp lighting techniques which are used during an examination:
Direct Focal Illumination
The direct focal illumination is the most frequently used method for closer inspection of the eye. The optic section, parallelepiped and conical beam are types of direct focal illumination.
The optical section is used to evaluate the severity of the patient’s cornea or finding out the opacity and depth within the lens. Direct the biomicroscope into the patient’s eye. The angle between illuminating and viewing path should be as big as possible but not extended beyond 90 degrees. Keep the slit length small, the most commonly used magnification is between 7 – 10 X.
The parallelepiped is used to assess corneal scars, abrasions, nerves and blood vessels. Focus the biomicroscope into the patient’s eye parallelepiped slit should be around 1 mm wide and 2 mm long. The light beam should be directed to the pupil at a 45 – 60 degrees angle. The examination should be done in a dark room and make sure to allow time to adapt to the change.
The conical beam is used to observe floating debris in the anterior chamber. It is recommended to use high magnification and dim the lights to a minimum or total darkness for this technique. At approximately 45 degrees, the beam is focused between the cornea and the surface of the anterior lens.
Diffuse Illumination
Diffuse illumination is used to provide light to the eye for general survey and observation. This method is useful if the patient’s cornea is opaque, and if you can’t obtain any optical section images. A wide beam of light with the slit fully opened is directed to the cornea or area of interest at 30 – 50 degrees angle. A low to medium magnification (5 – 12 X) is used to display a view of the eye and visualise the structures. Also, with particular dyes, cobalt blue filter or green (red-free) filter can be used together with diffuse illumination to determine various eye conditions.
Retroillumination
Retroillumination is the best method to study the cornea. It uses parallelepiped light to reflect unfocussed light of structures such as the iris, crystalline lens or the retina and observes the back-lighting. Firstly, you should dilate the patient’s pupils and adjust the slit width to 1-2 mm wide and 4-5 mm high. Use a low magnification (7-10 X) before reflecting light from the edge of the iris to illuminate the cornea. The iris is defective if you see an orange glow within the eye.
Sclerotic Scatter Illumination
Maximise the light source and focus a wide beam on the limbal region of the cornea. A low magnification (6 – 10 X) and a low angle should be selected so you can see the entire cornea at first glance. The cornea will appear transparent and clear if the eye is normal. However, an illumination or shadow suggests scars, deposits and opacities.
Specular Reflection Illumination
The specular reflection illumination is used to observe the endothelial cells of the cornea. Firstly, focus the biomicroscope in front of the patient’s eye. You should use high magnification and parallelepiped illumination at 45 – 60 degrees for this method.
Indirect Illumination
The indirect illumination is useful to determine irregularities of the corneal epithelium or foreign particles embedded in the cornea. A biomicroscope is directed to the area of interest, and immediately the light beam is positioned next to the focus area at approximately 45 degrees. The beam passes through the cornea but not the iris. As a result, the reflected, indirect light illuminates the cornea and allows close inspection.